Duplicating a Layer

In an earlier post Eric asks about how to duplicate a layer in Krita. It is possible, but how to do it is not obvious. In this post you learn how.  The trick is to remember that Krita is written in C++ and that means you need to be express about most things. In particular, you have to manually insert the duplicated node.  You can work in Scripter for this project.

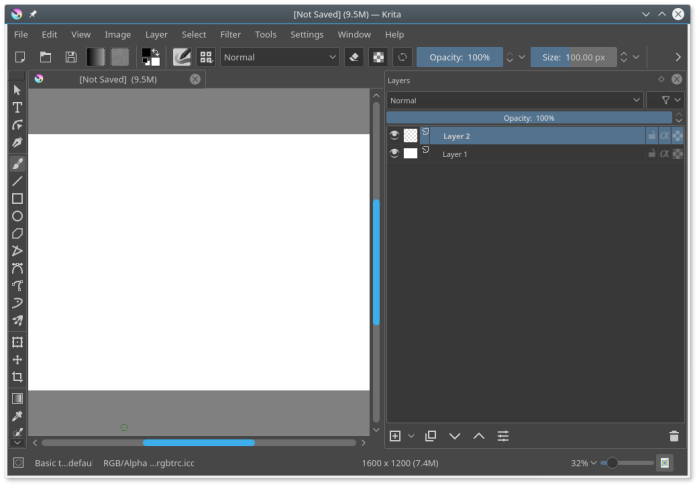
1. Create a document

First, start Krita and create a new document. The document that Krita creates should have two layers in it already – called Layer 1 and Layer 2.  (If it doesn’t you’ll need to create your own layer called Layer 2 or this won’t work):
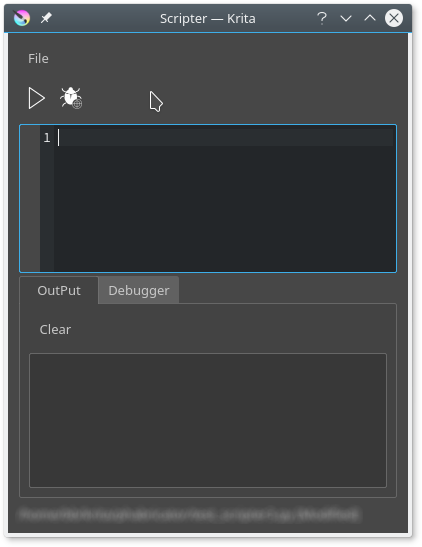
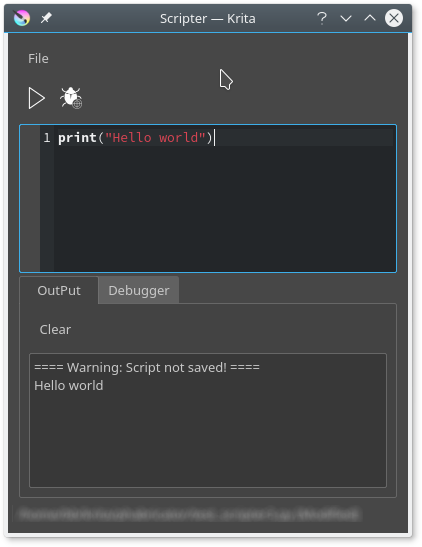
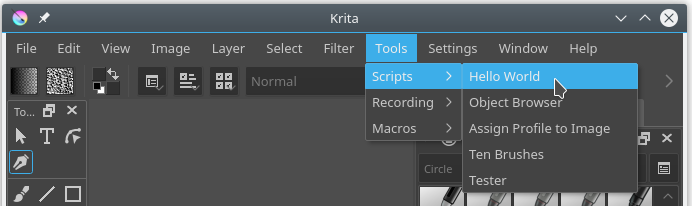
blog_180611_layer_duplicate1

2.  Start Scripter

You should know how to do this.  If not check the blog post.

3. Get a reference to the layer.

To get the layer, you’ve first got to get the document object:

doc = Krita.activeDocument()

You’re going to replicate the layer called Layer 2. In Krita, layers are called nodes, so you need to get a node with the name Layer 2. The document object has a method, nodeByName, that, given the layer’s name, returns the node of that name.

node_name = "Layer 2"
node = doc.nodeByName(node_name)

You can check you’ve got the right node, by checking its name (names are not unique, but at the moment there are only two nodes):

print(node.name())

4. Duplicate the layer

The node object has a method called duplicate that, duplicates itself. The only thing to note is that it returns a reference to the duplicated node and you have to keep the reference:

dupe = node.duplicate()

5. Rename the layer

The duplicated node has the same name as the node that was duplicated:

print(dupe.name())

Layer 2

So change the name of the duplicate:

dupe.setName("Duplicate Layer")
print(dupe.name())

Duplicate Layer

6. Insert the new Layer

This is the hard part! Not that it is difficult but, rather, it’s  knowing what to do. Duplicate just duplicates the node, it doesn’t actually attach it to the document. To do that you need to find the root node and add the duplicate as a child of that root:

root_node = doc.rootNode()
root_node.addChildNode(dupe, None)

The method takes two parameters – the node to be inserted and the node to be inserted above.

blog_180611_layer_duplicate2

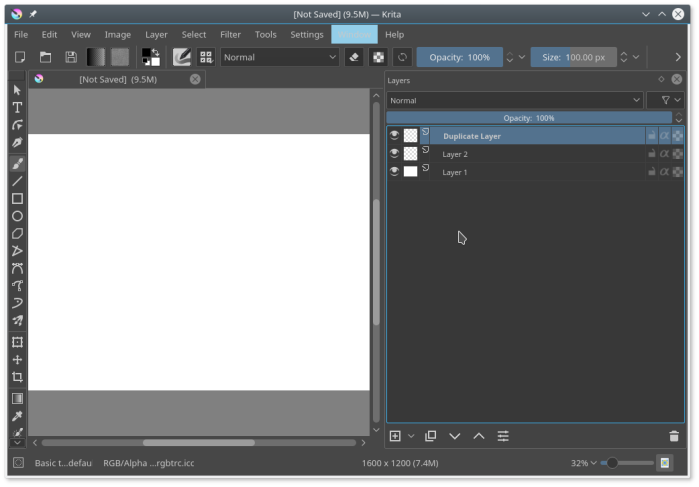
You’ve now duplicated that layer. If you don’t believe me, draw on Layer 2 and run the code again, check the duplicate has the drawing you’ve just made.

7. The Full Code

Here’s the full code:

doc = Krita.activeDocument()
node_name = "Layer 2"
node = doc.nodeByName(node_name)
print(node.name())
dupe = node.duplicate()
print(dupe.name())
dupe.setName("Duplicate Layer")
print(dupe.name())
root_node = doc.rootNode()
root_node.addChildNode(dupe, None)

Be careful. Each time you run this you’ll get a new duplicate.

Krita Scripts without Krita (Testing strategies)

Running up Krita just to test a change in your script can be a bit of a bore, … so don’t test your scripts in Krita. You can do a lot of debugging running them from the command line. The trick is to write the script so it will run properly whether it’s invoked within Krita or from the command line. You can do this with this code:

try: 
    import krita
    CONTEXT_KRITA = True
    EXTENSION = krita.Extension

except ImportError: # script being run in testing environment without Krita
    CONTEXT_KRITA = False
    EXTENSION = QWidget

You test if you can import krita. If you can, then the script is being run within Krita. Either way you set a flag CONTEXT_KRITA based on this test. You also need to set a constant EXTENSION (or DOCKER) and create your class based on this constant, rather than the base object.  For example:

class KritaScriptStarter(EXTENSION):

Rather than:

class KritaScriptStarter(krita.Extension):

That is, the superclass for your extension changes from being a Krita object (which, itself is a QWidget) to just a bare QWidget.  Then the script doesn’t have a Krita dependency.

You match this code with the following:

if  __name__ == "__main__":
    # this includes when the script is run from the command line or 
    # from the Scripter plugin.
    if CONTEXT_KRITA:
        # scripter plugin
        # give up - has the wrong context to create widgets etc. 
        # maybe in the future change this. 
        pass
    else:
        app = QApplication([])
        
        extension = KritaScriptStarter(None)
        extension.setup()
        extension.action_triggered()
        sys.exit(app.exec_())
        
elif CONTEXT_KRITA:        
    # And add the extension to Krita's list of extensions:
    app=Krita.instance()
    extension=KritaScriptStarter(parent=app) #instantiate your class
    app.addExtension(extension) 

This code checks to see what the value of __name__  is.  If __name__ == “__main__” then the script is being run from the command line (or from within krita’s scripter plugin).  If so, test for whether you’re operating in the Krita context (tested earlier when you  tried to import krita). If so, then the script is being run from within the Scripter plugin. If not, it’s being run from the command line. In that case you have to manually get your Qt application up and running (you’ll need to import QApplication earlier).

If __name__ is not “__main__” but you’re in the Krita context then you are running from within Krita, so you just set up your script as normal.

Now you can run your script equally from the command line or as a plugin from Krita.

BBD’s Krita Script Starter

[update: The script starter ended up being broken by a Krita commit that changed the way scripts are loaded. The starter should be included in an upcoming version of Krita  and this issue should be addressed there. If you can’t wait and want to update your version the code is here.]
If you’ve tried creating a Krita script you’ll know that it’s not too difficult, but it is a little tedious – creating a directory, creating the files, since you need half a dozen, cross referencing across the files. If that’s you, then there’s good news. I’ve written a script to automate this process. My script is called the Krita Script Starter:

blog_180316_krita_starter_script

The script comes with a ui file that it uses to build the interface. You need to have this file in the same directory as the script in order for it to run. You can use the script to bootstrap it into a Script in the Krita menu – run it, call the script Krita Script Starter. After it has set up the structure for you copy the .py and .ui files into the script’s directory, overwriting the template files it has created:

Download and extract this zip file

When you’ve extracted it, change to the file’s directory and run:

python3 krita_script_starter.py

The script has been submitted for inclusion in Krita, so may turn up as a pre-packaged script at some time in the future.

About Python, Krita, Qt5 and PyQt5

In this post you learn a little about the underlying framework that Krita uses to interface via Python. The Krita application is written in c++ using an application framework called Qt5. Krita provides access to its functionality for scripting by wrapping the c++ code and presenting it to Python. Krita is created on top of Qt5 objects, so most of the objects you encounter while scripting will be wrapped Qt5 objects. There is an existing library for Python wrapping Qt5 objects called PyQt5. So, when you are accessing objects from your Python scripts, you need to import the equivalent PyQt5 objects. For example, if you want to use a Qt5 QSettings object you will need to import the equivalent wrapped object from PyQt5.Core:

from PyQt5.QtCore import QSettings

Warning: Whether or not this will work depends on how you have obtained your version of Krita. If you are running from a packaged version – such as the Windows version or an appimage for Linux, then PyQt5 will be present in your environment. When I work with Krita that I have compiled from source, PyQt5 is not present and I need to manually install the relevant package (in my case python3-qt5) to my system with my package manner.

Because these objects are wrapped, you need to make sure that if you overwrite the object’s constructor (__init__) then you must make sure that you call the superclass’s constructor in your overwritten method. If you don’t then the c++ initialisation code will not be executed and your object will break (as none of the underlying c++ parts of the object are present). You did this in the extension skeleton with this code:

class MyExtension(Extension):

    def __init__(self, parent):
        super().__init__(parent)

In this code, the c++ constructor code for the Extension object is executed, with parent (ultimately, a reference to the running instance of Krita) passed as a parameter.

Keep References to Avoid Taking Out the Trash

Both Python and Qt5 are garbage collected languages. For this reason you need to take care to keep references to the objects you create. So, for example don’t simply create a widget, keep a reference to the created widget. If you have worked with Tkinter, you should be familiar with this.

Example:

label = QLabel("Some text")

not:

QLabel("some text").show()

Qt5’s “Event” Framework – Signals and Slots

Qt5 uses a system of signals and slots to connect its widgets with user actions. If you have used events before (eg with Tkinter programs) you can think of signals as being events and slots as callbacks. The big exception with this is that you don’t need to percolate or consume a signal – any number of slots can be connected in parallel with a single signal and they don’t need to manage each other’s access to the signal.

In your code:

    def setup(self):
        app = Krita.instance()
        action = app.createAction("name_of_action", "Menu Entry for Script")
        # parameter 1 =  the name that Krita uses to identify the action
        # parameter 2 = the text to be added to the menu entry for this script
        action.triggered.connect(self.action_triggered)
        
    def action_triggered(self):
        pass # your active code goes here. 

You create an action (a kind of object):

action = app.createAction("name_of_action", "Menu Entry for Script")

This action is displayed in the Krita UI by a menu entry in the Tools->Scripts menu. When a user clicks on this entry, it generates a triggered signal. The code:

action.triggered.connect(self.action_triggered)

connects that signal to the method self.action_triggered. A function that you connect a signal to is called a slot. Some signals pass additional information through parameters.

If you change the code in your action_triggered method, you can test that the code is run when you click the menu entry. For now, keep it simple and just add:

        print("In action_triggered")

You will need to run Krita from the console to see this. Now, each time you click your extension’s menu entry In action_triggered will be output to the console. In your own extensions you are going to want to use your slot to start running your code, either to process some information or present a user interface to get user data.

How Krita Executes Scripts

In this blog post you learn a bit about how Krita loads and executes your scripts.

How does Krita Execute Scripts

When starting up Krita runs through each of its enabled scripts and executes it. Taking the skeleton script in my earlier post as an example the class MyExtension is defined and then execution falls into this code:

# And add the extension to Krita's list of extensions:
app=Krita.instance()
extension=MyExtension(parent=app) #instantiate your class
app.addExtension(extension) 

That is, the code gets a reference to the Krita application, instantiates the MyExtension class and then adds that extension to the Krita application. You could put any code you like here and Krita will execute it on startup.

Ordinarily, scripts will define either a Krita Extension or a Krita Docker – you haven’t met dockers yet. You’ll need to wait for a later post!  In each case, the script will create an instance of the object before passing it to Krita to register it. This means that the __init__ methods of all of those classes will be executed.

After running all of the scripts Krita then goes back over all of the extensions that were registered with Krita in the previous step and runs each extension’s setup method.

Finally, Krita goes over each of the dockers you have registered in the first step. To register a docker you don’t instantiate it directly, rather you create a factory that will create the docker and pass the factory to Krita. Krita starts the docker factories after running the setup methods for any extensions you have.  That means that your dockers are instantiated later and, at that time, their constructor methods __init__ are run.

Introducing Krita’s Scripter Plugin

Now it’s time to break out Scripter, or break it in, in order to do a little scripting in Python on this blog.

Enabling Scripter

If this is your first time using Scripter you may need to enable it in the scripting menu following the instructions in my earlier blog post.

What is Scripter

Scripter is a “Plugin to execute ad-hoc Python code”, or at least that’s the description it gives itself in the Python Plugin Manager section of the settings menu. You can think of Scripter as a basic development environment for Krita Python. Scripter lets you execute Python code within Krita without having to write a complete plugin. It is not an interactive console – pressing return will not execute any code. To execute your code you have to press the Play button (see below). Scripter comprises of two main sections – an editor widget (Editor) and an output widget (Output). It has one menu (File) and two buttons (Run and Debug). The Scripter window looks like this:
blog_180112_scripter_1

You type your code into the Editor press run and anything that would normally be printed is sent to Output. So, to run your first program try this:

Type:

print("Hello world")

on line 1 of the Editor. Then press Run. You should get something that looks like this:

blog_180112_scripter_2

You should note that the Editor supports Python syntax highlighting and warns you to save your script.
If you click the debug button you can step through your script one line at a time. Scripter will also show the values you have named in your script. The debug screen looks like this:

blog_180112_scripter_3

To be honest, I haven’t actually used the debugger that much.

Your script can be saved through File->Save. This will give you a dialog box where you can choose where to save your script. Scripter will remember your last used script across sessions and automatically open it for you (whether you like it or not).

Save your script now.

As at 6 February, Scripter is somewhat inconsistent in how it treats saved files. When you first start Scripter, if you have used it in the past and saved a file it will automatically load the last saved file. If you make changes to the script without saving them it will run the script with the changes. Once you save them, Scripter will only run the file. So any changes you type into the editor will not be executed until you save the file. This is not such a bad thing – if you use a different, external editor, you can make changes and save them and Scripter will run the file as changed.

These additional functions should be in Scripter by the 4.0 release (not in the first beta, but currently in master if you want to compile your own):

  • Lines should auto-indent based on the previous line.
  • Use Tab/Shift-Tab to indent/dedent the selection
  • Use Ctrl-M to toggle comment marks on a selection of lines.

Earlier versions of Scripter had a problem with Python 3.4. If you have trouble running a script and you’re using Python 3.4, update your version of Krita and it should work.

Predefined names:

The main package that provides Krita related functionality is called krita. To access the Krita Python library you can import it like this:

import krita

Spend some time investigating the krita package. Remember though that krita is providing access to wrapped C++ functions. In practical terms this means that almost all of the attributes of krita (and other objects you chance upon) are going to be methods. Don’t expect any properties. Rather, expect all values to be accessed via getters and setters. For example to get the active document in Krita you’re going to have to call the Application.activeDocument() method, rather than accessing Application.activeDocument.
The krita package provides access to an object krita.krita that is different from the object referred to by by the Krita name, but seems to have the same attributes.

There are a couple of predefined names that are always available to you:
Krita, Application.  This means you can get access to stuff related to the current instance of Krita. For example

  • Krita.activeDocument() – the active document, if any
  • Krita.extensions() – extensions loaded (typically Python scripts)
  • Krita.views() – views (often only one) currently used by Krita.

Create An Extension Skeleton

In this post you will learn the basics of a skeleton extension for Krita, and how to load and run it. See the docs! If you have a single Python file that you want to run once off or occasionally you can do that through the scripter extension. However, if you want to run it through Krita’s Tools->Scripts menu then you will need to create a Python extension. In this post you’ll learn the bare bones of getting a script noticed by Krita.

[Update March 2018: Added reference to new Manual.html file]

[Update June 2018: updated docs ref, changes to code from new createActions structure]

Set up the files and directory structure

An extension is a script with additional files packaged together. An extension comprises of:

  • a script
  • a directory holding the script
  • a file called __init__.py in the same directory
  • zero or more other files that the script relies on, usually also in that directory or its subdirectories; and, finally,
  • a file ending in .desktop that contains metadata about the script.
  • [Update:] a Manual.html file in the script’s directory

Find the right directory

In order for Krita to load your extension all of these bits need to be in the right place for Krita to read them.  In practical terms, that means that everything has to go in Krita’s resources directory. You can find Krita’s resource directory like this:

  • start Krita
  • click Settings->Manage Resources
  • this opens a dialog box with buttons down the right hand side. Click the bottom button marked Open Resource Folder.

That should open a file manager at your resources directory! That’s where you’re going to be putting your files. On Linux that directory should be in ~/.local/share/krita/pykrita

Make a File for the Metadata and a Directory for the Extension

Call your extension my_extension. In your resources directory create:

  • a (text) file with the name my_extension.desktop; and
  • a subdirectory called my_extension.

Create the Files You’re Going to Need

They’re both empty at the moment. You’ll fix that soon. In the subdirectory called my_extension create two new (empty) Python files called:

  • __init__.py; and
  • my_extension.py; and
  • Manual.html

Create the Package

In the __init__.py file put this code:

from .my_extension import *

That’s just one line. And it’s “from dot my_extension import star”. Don’t miss the dot.

Create the Metadata

In the my_extension.desktop file put:

[Desktop Entry]
Type=Service
ServiceTypes=Krita/PythonPlugin
X-KDE-Library=my_extension
X-Python-2-Compatible=false
Name=The Name of your Extension
Comment=A comment you want shown in the list of Python scripts. 

The main things you’ll change when you write other extensions are: X-KDE-Library, Name and Comment. The last two are, I hope, self explanatory.  X-KDE-Library is the name of the directory that your extension is in.

Write the Script

The bare minimum code you need to get your script into the Tools-> Scripting menu on Krita is:

from krita import Extension,  Krita

class MyExtension(Extension):

    def __init__(self, parent):
        #Always initialise the superclass.
        #This is necessary to create the underlying C++ object 
        super().__init__(parent)

    def setup(self):
        pass

    def createActions(self, window):
        action = window.createActions("name_of_action", "Menu Entry for Script","tools/scripts")
        # parameter 1 =  the name that Krita uses to identify the action
        # parameter 2 = the text to be added to the menu entry for this script
        # parameter 3 = location in Krita menu to put this script entry
        action.triggered.connect(self.action_triggered)
        
    def action_triggered(self):
        pass # your active code goes here. 

# And add the extension to Krita's list of extensions:
app=Krita.instance()
extension=MyExtension(parent=app) #instantiate your class
app.addExtension(extension) 

This Extension doesn’t actually do anything! I will analyse the script, and make it do something in a following post.

[Update]

Write the Manual

Krita parses the contents of the Manual.html file and displays it in the bottom pane of the Python Plugin Manager when you are enabling (or disabling) your scripts (see the next section).   A basic skeleton for the manual looks like this:


Title


Name of the Script

Tell people about what your script does here. This is an html document so you can format it with html tags.

Usage

Tell people how to use your script here.

Enable Your Script

Finally, you need to enable your script in the settings dialogue. Krita won’t list your scripts in the scripting menu until you have manually enabled them. See my post on enabling scripts for how to do that. When you are enabling your script you have to look for it under the name you gave it in the desktop file. In the example above you would look under “T” for “The Name of your Extension” since that’s the name in the desktop file.

A note on naming conventions

Krita uses an application framework called Qt5. It uses a camelCase naming convention. Python, on the other hand uses BiCaps for class definitions and lower_case_with_underscores for other names. Whichever convention you chose you’re going to have trouble because, sooner or later, you’re going to have to access both Qt5 functions and functions from Python’s Standard Library and you’re naming convention can’t be consistent with both of those. I think it is best to stay with Python naming conventions. At least that way you are implicitly identifying your code as Python code.

Updates to Scripter Python Editor

Ahoy Krito-scripto-nauts!

I have recently added a UI improvements to the Python Editor in Krita’s Scripter tool. These are currently in the Krita master and should be available in tonight’s nightly build if you are Windows.   Technically, as these are changes to Python scripts that are shipped with Krita, you don’t need to recompile/reinstall, although that is probably the least complicated thing to do.

What do they do?

  • Allow Scripter to run on Python 3.4 systems. If you are using Windows or an appimage this won’t matter to you because Python is packaged with a high enough version of Python. However, if you’re on a system that is stuck on Python 3.4 (Hello OpenSuSE) you’re going to need this to use the scripter.
  • Use a monospace font in the Output window. Which makes it easier to…
  • Improve error reporting, by showing location of your error in the output window. Previously Scripter would pop up a window dialog telling you the error and the line where it occurred (depending on the type of error), but without any code context. This change also means you don’t have to close a dialog box before correcting your error.
  • Add indent/dedent to the editor. Previously, pressing tab inserted 4 spaces, and shift tab cycled through widgets in the Scripter dialog. Now you can indent and dedent your code blocks. Woo!
  • Adds auto-indent. The editor will now do it’s best to indent new lines to an appropriate indent level automatically (previously each new line started at column 0)
  • Adds toggle comment functionality. Select some text and press Ctrl-M to comment it out (or uncomment it if it is already commented). Keep pressing it all day if you get bored.

If you can’t wait to get the new builds or can’t be bothered recompiling you can get the three new Python files and replace them in your existing Krita directory – <krita_install>/share/krita/pykrita/scripter/ui_scripter

tabwidgets/outputwidget/outputtextedit.py

actions/runaction/runaction.py

editor/pythoneditor.py

Just download the raw file (there is a link in the box to the right) and replace the corresponding file in your directory structure with these new file.


Enabling Scripting in Krita 4.0.0-beta1

In my first blog post I talked about how to write a simple script to run in the alpha version of Krita 4. In this post I explain how to turn on scripts in Krita 4.0 beta and to enable the Scripter environment.  Scripter allows you to write your own short scripts and execute them from within Krita.

Prerequisites

[Update: apparently there is a problem with packaging Krita on Windows and scripting is not working as a result. So, atm if you want scripting you’re going to have to build Krita from sources yourself, regardless of the platform you’re on. Try the nightly builds if you are Windows. ]

In order to use Krita scripting you will need to either be running both Windows and Krita 4.0.0-beta1 or run Linux (or OSX) and do a bit of extra work. If you are running Linux, the appimage does not include Python scripting. At the moment to use scripting on Linux you will need to download the Krita source and compile your own copy of the application. This link has more information on compiling your own version of Krita. In addition to compiling the software, you will also need a copy of Python 3 (preferably 3.5 or higher) installed – it is a reasonably safe bet that you already have this on most Linux distros.

Turning On Scripting

So, you’ve got Krita running, but where is the Python? In Krita 4.0 alpha scripting was turned on by default. In the beta, the reverse is true – scripting is turned off by default. When you first launch Krita you will be able to see the Scripting menu in Tools->Scripts but that menu will have no items in it. For you to run any scripts (even those shipped with Krita) you need to enable the scripts from the settings menu.

Go to Settings->Configure Krita. This will display the settings dialog box:

blog_180112_settings
From there, click on Python Plugin Manager. This will give you a list of the Python plugins that Krita can find. To enable a script, click the checkbox beside it.

blog_180112_python_plugins

Right now (12 Jan 18) you have to enable or disable each of the scripts individually. There is no “select all” option. This will probably be changed in the final release.

For the time being, enable the Scripter plugin. This will allow you to write your own scripts and run them from within Krita.

Click OK, then restart Krita. The scripts will not show up in the Scripts menu until you have restarted the application.

Whether or not a script shows up in the Tools->Scripts menu will depend on how the script is written. Some scripts are written to be dockers and other scripts may be neither. If you enable a script and can’t see it in the Tools->Scripts menu look for it in the Settings->Dockers menu.


Hello World in Krita Scripting

Summary

In this post you learn how to hook up a simple script to Krita, including adding a menu entry and triggering the entry.

Background

The upcoming version of Krita will include the ability to script the program using Python. This was a stretch goal from the 2016 Kickstarter campaign.  As at June 2017, Python scripting in Krita is not in the stable version. If you want to tinker with scripting in Krita (and follow this blog), you’re going to have to get yourself a more recent development version and compile it yourself.  The version I am using is 4.0.0-pre-alpha (git c2b3000).  Scripting in Krita uses Python 3, so make sure you’re not on Python 2.7.

To avoid using the other Krita(s) installed on my system, I run krita from the command line in the install directory of the compilation tree (> ./krita).

My version of Krita comes with two sample scripts located in /share/krita/pykrita/  These scripts are called assignprofiledialog and tenbrushes. It also has some utility scripts.

To create a basic script:

Setting up Files

  • decide on a name. In this case, hello_world
  • create a directory hello_world in ~/.local/share/krita/pykrita/ (if you’re on an alternative operating system, you’ll have to find your equivalent directory, or contribute it in the comments section)
  • in the new hello_world directory ~/.local/share/krita/pykrita/hello_world create two files:
    • __init__.py; and
    • hello_world.py
  • in the pykrita directory create a file called kritapykrita_hello_world.desktop (seriously, krita needs to see this desktop otherwise it won’t load the script)

Coding

  • In __init__.py import the contents of the hello_world.py file:
from .hello_world import *
  • In kritapykrita_hello_world.desktop add the following text (this is pretty much the minimal entries.  Note that X-KDE-Library is set to the name of your script’s directory
[Desktop Entry]
Type=Service
ServiceTypes=Krita/PythonPlugin
X-KDE-Library=hello_world
X-Python-2-Compatible=false
Name=Say hello world
Comment=Say hello world
  • In hello_world.py add the following text:
"""
Basic script to hello world from krita

"""
  
import krita
   
class HelloWorld(krita.Extension):

    def __init__(self, parent):
        print("in HelloWorld init")
        super().__init__(parent)
        print("leaving HelloWorld init")

    def hello_world(self):
        print("hello_world")

    def setup(self):
        print("entered HelloWorld setup")
        action = Application.createAction("Hello World")
        action.triggered.connect(self.hello_world)
        print("leaving HelloWorld setup")      

instance = HelloWorld(Application)
Scripter.addExtension(instance)
# krita provides Scripter and Application on import

What’s happening here?

Imports – you import the krita module. When it imports it sets up some things, including creating the objects Scripter and Application. The sample scripts just import * from krita.

You create a class called HelloWorld that inherits from krita.Extension. You create an instance of the class, passing Application to the constructor. You can call the class what you like, as long as you instantiate it, and add that instance as an extension.

In the HelloWorld class there are three methods: the constructor, __init__, which is run when the class is being instantiated; setup which is run after all scripts have been initialised and krita is setting up the scripts to run in its environment; and hello_world. During setup the code action = Application.createAction(“Hello World”) adds a menu entry called Hello World to krita’s menu structure (at Tools->Scripts->Hello World). It then hooks up the hello_world method to the krita menu entry by action.triggered.connect(self.hello_world). Each time you select Hello World from the scripting menu this causes the hello_world method to run. When it runs, it prints hello world in the console.

Here’s what it looks like (I have two other scripts under development (Tester and Object Browser), they are also shown in the menu):

scriptingtute1_screenshot

When you run krita you get this output:

>./krita

[krita diagnostic messages omitted]

in HelloWorld init
leaving HelloWorld init

[output from my other scripts, and an error from krita.scripting omitted]

entered HelloWorld setup
leaving HelloWorld setup

Button KoToolBoxButton(0xa40d0a0, name="VectorTool") has a conflicting priority
Button KoToolBoxButton(0xa4366d0, name="KritaShape/KisToolText") has a conflicting priority

Then when you select Hello World from the menu you get the additional line:

hello_world

in the output. Nothing is happening inside Krita yet. This is output to the command line.

Congratulations. You’ve hooked up and run your first Krita script.